LED Projects for Kids
I have been offered an opportunity to teach maker education again at a local summer enrichment program during summer, 2016. Last summer was my first time around so I experimented with lots of different maker education activities to see what worked and didn’t work with the 5 to 10 year old kids. I now have this foundation and can build upon this foundation. I love creating new learning activities and will be thinking of new ways to use the materials so my returning students will have new activities. I plan to blog about those activities as I formulate them so (1) I don’t forget about them, (2) others will have access to them, and (3) folks will realize that maker education can be implemented with accessible, fairly cheap materials; that a makerspace is not required to do maker education.
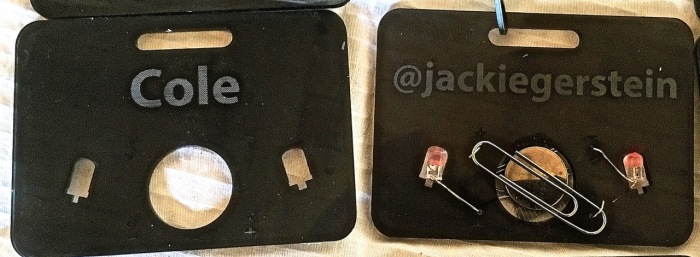
LED Nametags
Materials:
- Laser Cut LED Nametag – http://www.instructables.com/id/Light-Up-Place-Card/
- Blinking LEDs
- Steel Wire or Large Paper Clips
- Coin Batteries
LED Throwies Meet the Magnetic Board
Materials
- LEDs (see http://lighthouseleds.com/)
- Coin Batteries (I get mine in bulk from ebay)
- Magnets (I also get these in bulk from ebay)
- Electric tape
- Individual Magnetic white boards
- Dry erase markers
Procedures
- Each learner is given the task to make 4-6 LED throwies (with the intent that they aren’t going to be thrown.
http://makezine.com/projects/extreme-led-throwies/
- Directions from Make Magazine:
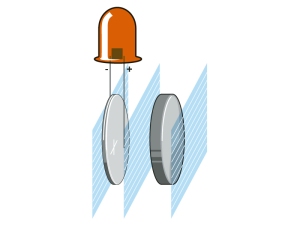
- Pinch the LED’s leads to the sides of the battery, with the longer lead (the anode) touching the battery’s positive (+) terminal, and the shorter lead (cathods) touching negative (–). It should light up.
- Cut a 7″ length of strapping tape or electrical tape, and wrap the leads tightly to the battery so the LED does not flicker. Wrap once around both sides of the battery.
- The battery’s positive contact surface extends around the edges of the battery, so don’t let the short lead (cathode) touch it or you’ll short the circuit.
- More about LED throwies can be found at http://www.makereducation.com/led-throwies.html
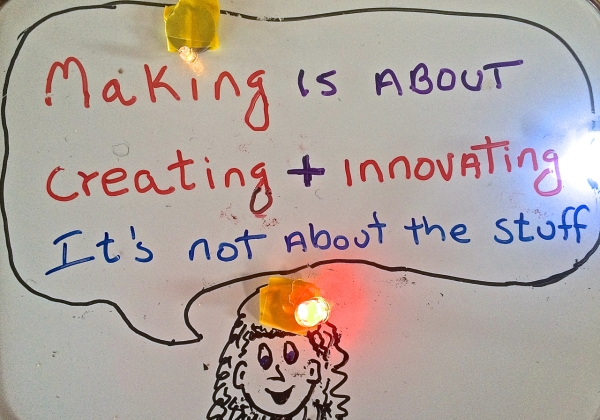
- Each learner is then given a magnetic dry erase board and the task to create a design using both their LED throwies and dry erase makers (like the opening photograph).
- Since it is a dry erase board, learners can be encouraged to create multiple iterations of their LED-based art pieces. Photos can be taken so the learners feel comfortable with erasing and creating new art works.
- Learners can work with partners and switch around their LED throwies creating new and unique designs.
- Group Version:
- Small groups form a design on a larger classroom whiteboard. They all put their LED throwies on the larger magnetic, dry erase board. They all then use the dry erase markers to create a group mural.

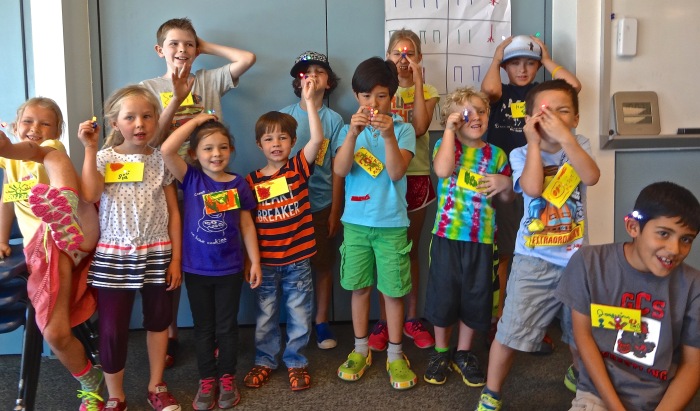
This is a whole group example prior to me realizing they could have decorated their LED group creation with the dry erase makers.
LED Craft Foam Bracelets, Bookmarks, and Pictures
Bubble Casing with LEDs
An LED-Lit City
Painters Cap Hacked with LEDs
Materials:
- White Painters’ Caps
- Fabric Markers or Paint
- LEDs
- Cooper Tape or Lilypads (depending on age)


Leave a comment